
How to Use Electric Chainsaw Sharpener: A Practical Guide for 2026
Learn how to use electric chainsaw sharpener techniques to restore cutting edges, calibrate angles, and maintain depth gauges for clean woodcutting in October 2026.
 By Bradley Ford
Updated October 2, 2026
By Bradley Ford
Updated October 2, 2026

Woodcutters and property owners frequently encounter the frustration of a dull saw chain that generates powdery sawdust instead of crisp wood chips. Operating a saw with blunt cutting edges increases physical fatigue, overheats the guide bar, and puts excessive mechanical strain on the powerhead. While manual filing with a handheld file guide can be slow and physically demanding, learning how to use electric chainsaw sharpener equipment allows you to restore factory-fresh cutter geometry in a fraction of the time. Handheld electric rotary sharpeners use high-speed abrasive stones to reshape hardened steel cutters with uniform precision, removing human inconsistency from the sharpening process.
A properly sharpened chain pulls itself effortlessly through the wood without requiring the operator to exert dangerous downward force on the handles. When cutting teeth become rounded from dirt, sand, or prolonged hardwood bucking, saw performance drops dramatically. While some property owners reach for dedicated pruning saws for gardeners to tackle light residential limbing tasks, processing firewood and felling trees requires a sharp cutting chain. Mastering the setup, angle guides, stone selection, and light grinding touches of an electric sharpener keeps your equipment working efficiently and prolongs the lifespan of your saw chain.
| Award | Product | TGH Score About TGH ScoreThe TGH Score is our own rating from 0 to 10, based on performance, design and build, ease of use, and value. It reflects independent research and is never influenced by manufacturers, retailers, or affiliate commissions. Learn more › | |
|---|---|---|---|
| Best Overall |
Sharp Pebble Electric Cordless Chainsaw Sharpener
|
9.1/10 | Buy |
| Best Value |
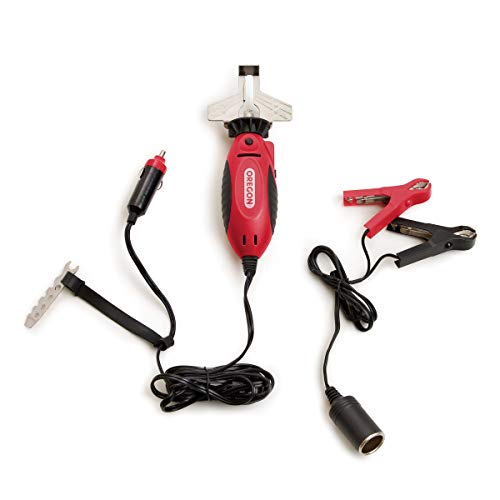 Oregon 12V Sure Sharp Electric Chain Sharpener
|
8.8/10 | Buy |
Mastering the Handheld Electric Chainsaw Sharpener
Operating a powered sharpener correctly requires matching the abrasive stone diameter to your chain pitch, setting the angle guide plate, and applying short, controlled touches to each cutting tooth. Electric sharpeners utilize high-speed rotating grinding stones to remove damaged chrome plating and recreate the razor-sharp cutting edge on chain teeth. Rather than pressing heavily into the steel, the operator guides the rotating stone against the cutter face for two to three seconds at a time. This controlled process maintains consistent top-plate angles across the entire chain loop while avoiding overheating the cutter metal.
Essential Safety Protocols and Saw Preparation Before Grinding
Disconnecting the chainsaw power source completely is the mandatory first step before bringing any motorized grinding stone near your cutting assembly. For gasoline models, pull the spark plug boot firmly off the terminal to prevent accidental ignition while advancing the chain. If you are servicing a cordless battery chainsaw, remove the battery pack from the housing, or unplug corded electric saws from the wall outlet. Always put on heavy leather cut-resistant gloves and impact-resistant safety glasses with side shields before handling sharp chain cutters and rotating grinding stones.
Securing the chainsaw guide bar firmly in place prevents chatter and ensures accurate file angles. You can clamp the bar body in a dedicated bench vise or use a portable stump vise hammered into a nearby log when working outdoors. Tighten your chain tension slightly beyond normal operating tension before grinding to stop the cutters from rocking backward on the guide bar rails. Make sure the chain brake is disengaged so you can advance the chain smoothly along the bar by hand as each tooth is finished.
Matching Grinding Stone Diameter to Chain Pitch
Selecting the correct stone size is the most critical mechanical step when setting up an electric sharpener. Saw chains are manufactured with specific pitch dimensions, which dictate the radius of the cutter gullet and the necessary curvature of the cutting hook. Using the wrong stone diameter alters the cutter geometry, causing the tooth to either dig too aggressively or skate over wood fibers without cutting. Most electric sharpening kits provide interchangeable grinding stones or wheels in three primary standard diameters.
A 5/32-inch (4.0mm) grinding stone is designed specifically for 1/4-inch pitch and 3/8-inch Low Profile chains, commonly found on consumer electric saws, mini pruning chainsaws, and light gas saws. When working with .325-inch pitch chains, switch to a 3/16-inch (4.8mm) stone to match the taller cutter tooth profile. Standard 3/8-inch professional chains and large .404-inch pitch harvester chains require a 7/32-inch (5.5mm) sharpening wheel to maintain the correct side-plate hook angle without gouging the tie straps. Inspect your guide bar stamping or chain box label to confirm your chain pitch before installing an abrasive stone.
Installing the Abrasive Stone and Angle Guide Attachment
Handheld sharpeners utilize a threaded collet system to lock the grinding stone shank securely into the drive spindle. Depress the spindle lock button on the tool body and unthread the collet nut counterclockwise using the supplied collet wrench. Slide the selected stone shank fully into the brass collet sleeve, then hand-tighten the outer collet nut clockwise until it grips the shaft. Use the wrench to apply firm torque to the collet nut while holding the spindle lock button, ensuring the stone will not slip during operation.
Fasten the chain angle guide attachment directly over the threaded tool nose around the grinding spindle. This guide attachment features marked reference lines that represent standard sharpening angles, typically indexed at 25, 30, and 35 degrees. Check that the guide plate sits square and rigid against the sharpener housing without wobbling or flexing. Spin the stone by hand before turning on the power switch to verify that the abrasive cylinder runs true without visible eccentricity or axial wobble.
Setting the Grinding Angle and Aligning with the Cutter
Locate the shortest or most heavily damaged cutter tooth on the chain loop to serve as your master reference cutter. Sharpening all subsequent teeth to match the length of this master cutter ensures uniform cutting action across the entire kerf. Mark the top plate of this reference tooth with a bright lumber crayon or permanent felt marker so you know exactly where your sharpening cycle began. Position the sharpener guide plate flat across the top rails of the guide bar or parallel with the bar body.
Align the guide line stamped on the tool with the cutting edge angle specified by your chain manufacturer. Most standard round-ground semi-chisel and full-chisel chains utilize a 30-degree or 35-degree top-plate angle, though some ripping chains specify a 10-degree angle. Keep the axis of the electric sharpener level and horizontal at a 90-degree angle relative to the vertical face of the guide bar unless the manufacturer requires a 10-degree downward tilt. Double-check that the abrasive stone seats smoothly into the curved gullet of the cutter tooth without binding against the depth gauge in front.
Step-by-Step Tooth Grinding Technique
Turn on the sharpener motor and allow the stone to reach its full operating speed before making contact with the cutter. Bring the rotating stone gently into the gullet of the cutter tooth, letting the abrasive surface kiss the underside of the top plate and side plate simultaneously. Apply light, steady pressure toward the rear and inside corner of the cutting tooth rather than pushing downward into the chain chassis. Two or three brief touches lasting approximately one to two seconds each are far more effective than holding the stone continuously against the metal.
Watch the color of the steel and the shower of tiny sparks exiting the cutter face. If the tooth turns a dark blue or purple color, the steel has overheated, losing its factory temper and becoming brittle. To prevent thermal damage, maintain a delicate touch and let the stone spin freely between short passes so cooling air circulates around the tooth. Stop grinding the reference tooth as soon as the cutting edge shows a clean, bright chrome finish without nicks, rounding, or dull reflection.
Count the number of gentle grinding pulses used on the master tooth, or note the duration of contact, so you can duplicate the material removal on every tooth. Release the tool from the cutter, pull the chain forward along the guide bar with your gloved hand, and engage the next tooth facing the same direction. Continue cycling around the entire loop, sharpening only the cutters that angle in that same direction until you return to your marked master cutter.
Sharpening the Opposing Cutters for Balanced Performance
Chainsaw chains alternate between right-hand and left-hand cutters along the drive links to balance cutting forces in the kerf. Once you have completed all cutters on the initial side, reposition yourself or rotate the saw to sharpen the opposing cutters. Adjust your tool orientation to match the reverse 30-degree or 35-degree guide line marked on the angle plate. Maintaining the exact same angle on both cutter sets is essential to keep the chainsaw tracking in a straight line through timber.
Grind each opposing tooth using the exact same number of light touches and consistent contact pressure established on the first side. Check the overall length of several left-hand and right-hand top plates using a small dial caliper or depth gauge plate to verify symmetry. If one side is left significantly longer than the other, the saw will pull sideways, binding the guide bar in the cut and producing curved kerfs. While hand tools like manual hand saws for tree branches rely on flexible blades, a chainsaw requires perfectly symmetrical cutters to prevent guide bar jamming and uneven rail wear.
Measuring and Filing Depth Gauges
The depth gauge, commonly called the raker, is the curved metal hump located directly in front of each cutting tooth. This component dictates how deeply the sharp cutting edge can bite into the wood fibers during each pass of the chain. As you repeatedly sharpen and shorten the cutting teeth, the relative height difference between the top plate and the depth gauge diminishes. If you sharpen the teeth without lowering the depth gauges, the cutters will skate across the wood surface, producing fine powder and failing to cut.
Place a progressive depth gauge tool flat across two adjacent cutters, allowing the slotted cutout to drop over the depth gauge peg. For standard cutting in mixed hardwoods, the recommended clearance is typically 0.025 inches, while softwoods or clean pine may accept 0.030 inches of clearance. If the top of the depth gauge protrudes above the hardened steel plate of the tool, file it down flush using a flat mill file. Never use an electric rotary grinding stone to reshape depth gauges, as high-speed rotary stones can easily gouge the raker too low.
After filing the depth gauge down flush with the gauge tool, use your flat file to round off the leading front corner of the peg. Maintaining a smooth, rounded front profile allows the depth gauge to glide over wood grain and knotty timber smoothly. Leaving a sharp, square leading edge causes the chain to chatter, grab violently in the cut, and significantly increases the risk of severe rotational kickback. Take your time to round each raker uniformly across the entire chain loop.
Power Source Logistics: Cordless Packs vs. 12V Alligator Clips
Electric chainsaw sharpeners come in two primary configurations: rechargeable cordless units and tethered 12-volt models. Cordless rotary sharpeners run on internal or swappable lithium-ion battery packs, providing complete freedom of movement in dense woodlots or off-grid homesteads. They eliminate tripping hazards and cord tangles around the guide bar, allowing you to sharpen a chain directly on the powerhead anywhere on your property. However, operators must monitor battery discharge levels, as dropping cell voltage can reduce rotary RPM and lead to uneven grinding.
Tethered 12-volt sharpeners feature heavy-duty power cords terminating in alligator clamps or a 12V automotive auxiliary plug. These tools connect directly to your truck, tractor, or utility vehicle battery, delivering constant, non-fading motor torque for continuous sharpening sessions. When using alligator clips, attach the red clamp to the positive battery terminal and the black clamp to the negative terminal or clean vehicle chassis ground. Keep the vehicle engine off during tool use to prevent charging system surges from damaging the compact electric sharpener motor.
Troubleshooting Common Electric Sharpening Faults
One frequent mistake when using electric sharpeners is pushing too hard against the cutter face, which causes the grinding stone to stall or chatter. When the rotating stone binds against the steel, it creates deep scallops in the cutter gullet and rapidly wears flat spots on the abrasive stone. If you notice motor bogging or stone slowing, reduce your hand pressure immediately and let the high surface speed of the abrasive do the cutting work. Clean any accumulated pitch or metal swarf off the stone surface periodically to restore its abrasive bite.
An undercut or hooked cutter profile occurs when the operator presses the stone too low into the gullet or uses an undersized wheel. A hook-shaped tooth bites into timber too aggressively, causing intense vibration, rapid chain dulling, and dangerous snatching under throttle. Conversely, using an oversized stone or holding the tool too high creates a blunt, sloping cutting edge that refuses to sever wood fibers. If your cutting edge appears improper, double-check your stone diameter against the chain pitch specifications and re-align the tool angle guide.
Crooked cutting, where the guide bar curves to the left or right during bucking cuts, is almost always caused by uneven sharpening. When right-hand cutters are ground shorter or at sharper angles than left-hand cutters, the saw exerts unbalanced lateral force in the kerf. To rectify this issue, measure each tooth with a small ruler or caliper, identify the shortest tooth, and grind the longer cutters back until all teeth match in length. Inspect the guide bar rails as well to confirm that one side has not worn lower than the other.
Post-Sharpening Cleaning, Re-Tensioning, and Field Verification
Thoroughly cleaning the cutting assembly after grinding is essential before restarting the chainsaw engine. Powered sharpening produces a spray of fine, abrasive metal dust that can settle into the chain drive links, guide bar groove, and sprocket bearing. Use a soft brush or compressed air to blow out all grit from the bar rails and chain chassis, preventing premature wear on your drive components. Apply several drops of bar and chain oil directly onto the chain links to lubricate the rivets before operation.
Check your chain tension on the guide bar, as sharpening and chain handling often loosen the chain loop. When pulled away from the bottom rail, the drive links should not drop completely out of the bar groove, but the chain must still rotate smoothly by hand without binding. Start the chainsaw engine or connect the battery pack, verify that the bar oiler delivers a steady spray pattern against a clean log or scrap board, and make several test bucking cuts in clean hardwood rounds. A properly sharpened chain will self-feed smoothly into the timber, producing large, rectangular wood chips rather than fine, powdery sawdust.
Consistent maintenance routines ensure your saw chain stays ready for heavy cutting without requiring frequent replacement. Inspecting each cutter after hitting dirty bark or hidden debris helps you address dull spots before they cause severe bar wear or motor strain. By following proper grinding techniques, setting precise cutter angles, and maintaining proper raker clearances, you can keep your chainsaw cutting fast, straight, and safe throughout every season.
About the author

Bradley Ford is an experienced hands-on tool tester with a background in farm equipment, welding, mechanical repair, and classic automobiles. His practical experience includes repairing and servicing high-end vehicles as well as testing tools, generators, lawn equipment, and workshop gear. He approaches product evaluation from the perspective of someone who regularly builds, repairs, and maintains equipment.