
Are Chainsaw Bars Interchangeable? Compatibility Guide for 2026
Find out if are chainsaw bars interchangeable with our guide on motor mounts, pitch, and gauge for October 2026.
 By Phil Harrington
Updated October 2, 2026
By Phil Harrington
Updated October 2, 2026

Bucking firewood or clearing downed timber puts substantial mechanical stress on cutting attachments over time. Guide bars eventually suffer from pinched rails, mushroomed edges, or worn sprocket nose bearings that compromise cutting accuracy and operator safety. When searching for replacement hardware, woodcutters frequently ask are chainsaw bars interchangeable across different saws and manufacturers. Swapping guide bars requires an exact match of mounting geometry, chain pitch, and groove gauge rather than simply picking a bar of the same nominal length. Operators preparing for seasonal woodlot clearing or evaluating pruning saw alternatives for small limbs must recognize that guide bars are precision components engineered around specific powerhead configurations.
Running an improperly matched guide bar risks severe equipment damage, oil starvation, chain derailment, and dangerous rotational kickback. Modern chainsaws utilize specific motor mount patterns, oil delivery passages, and tensioner pin locations engineered around the chassis. Understanding how these mechanical variables interact allows homeowners and landowners to choose compatible replacement guide bars safely and economically. By evaluating drive link counts, motor mounts, and chain specifications, you can keep your saw cutting straight and running reliably without risking expensive engine damage.
| Award | Product | TGH Score About TGH ScoreThe TGH Score is our own rating from 0 to 10, based on performance, design and build, ease of use, and value. It reflects independent research and is never influenced by manufacturers, retailers, or affiliate commissions. Learn more › | |
|---|---|---|---|
| Best Overall |
Oregon 14" Bar & Chainsaw Chain Combo, 3/8"
|
8.8/10 | Buy |
| Best Value |
 16 Inch Chainsaw Bar and Chain Combo
|
8.8/10 | Buy |
| Best Budget |
 Oregon 16" Bar & Chainsaw Chain Combo, 3/8"
|
8.6/10 | Buy |
| Best Premium |
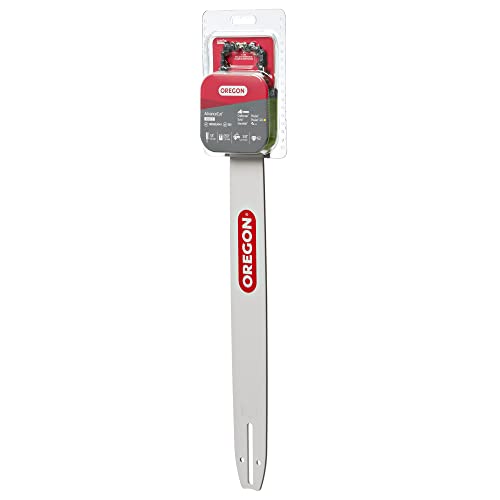 Oregon 18" Bar & Chainsaw Chain Combo, 3/8"
|
8.1/10 | Buy |
Chainsaw Bar Compatibility and Mounting Specifications
Chainsaw guide bars are not universally interchangeable between different chainsaw models or manufacturers. Even if two guide bars share the exact same overall length, they cannot simply be swapped without matching the motor mount pattern, chain pitch, chain gauge, and drive link count. A guide bar must align precisely with the bar studs, chain tensioner pin, and pressurized oil delivery hole of the specific powerhead. Installing an incompatible guide bar can block oil flow, cause the chain to derail at high speed, or cause severe mechanical damage to the drive clutch.
Many woodcutters assume that a sixteen-inch bar from one brand will fit any sixteen-inch chainsaw found in a workshop. In reality, guide bar design involves tight engineering tolerances that dictate how the cutting chain interfaces with both the powerhead and the timber. Evaluating compatibility requires looking past the exterior dimensions and examining the stamped mechanical specifications located near the tail mount. Taking time to inspect these critical measurements ensures that your cutting setup operates smoothly and reduces premature component wear.
The Motor Mount Pattern and Tail Geometry
The motor mount pattern refers to the specific slot and hole configuration stamped into the tail end of the guide bar. This tail slot slides over the threaded bar mounting studs on the powerhead casing, allowing the bar to clamp securely in place. Bar mount slots vary in width, commonly ranging from 8.2 millimeters on small consumer saws to 12 millimeters or larger on professional forestry powerheads. If the slot is too narrow, the bar will not slide onto the studs; if it is too wide, the bar will shift out of alignment during heavy cutting.
Beyond the primary mounting slot, the tail geometry incorporates dedicated holes for the chain tensioner pin and the oil supply port. The chain tensioner pin moves backward and forward along an adjustment screw to establish correct chain tension. If the pin holes on a replacement guide bar do not align with the powerhead tensioner mechanism, the operator cannot adjust chain slack safely. Forcing an incompatible mount pattern onto a powerhead often bends the tensioner screw or cracks the crankcase casting.
The oil inlet hole on the guide bar tail must align perfectly with the oil discharge passage of the chainsaw oil pump. When the engine runs, the automatic oiler pumps bar and chain lubricant through this port into the bar groove. If an aftermarket bar covers the oil discharge channel, lubricant cannot reach the cutting chain and guide bar rails. Running a saw with an obstructed oil port causes excessive friction, discolors the steel rails with heat, and can destroy both the bar and chain in minutes.
Chain Pitch and Drive Sprocket Synchronization
Chain pitch defines the distance between any three consecutive rivets on the saw chain divided by two. Common pitch sizes include 1/4-inch, .325-inch, 3/8-inch low profile, standard 3/8-inch, and .404-inch. A replacement guide bar equipped with a sprocket nose must match the pitch of the powerhead drive sprocket exactly. For example, an Oregon combo configured for 3/8-inch pitch will bind immediately if paired with a powerhead driving a .325-inch spur or rim sprocket.
The sprocket nose embedded in the tip of a guide bar reduces rotational friction as the cutters transition around the nose curve. The teeth of this nose sprocket are spaced to accept drive links of one specific pitch dimension. If an operator attempts to run a chain of mismatched pitch over a sprocket nose, the drive links will ride high on the teeth rather than seating into the gullets. This misalignment creates intense vibration, wears the nose bearing rapidly, and can cause the chain to snap under load.
Before purchasing a replacement bar, inspect the drive sprocket located behind the clutch drum on your saw. Whether your powerhead uses a stamped spur sprocket or a floating rim system, the stamped pitch marking on the drum must match the bar nose. When maintaining various cutting setups, such as dedicated firewood saws alongside saws for timber dimensioning, keeping pitch components uniform across your gear prevents accidental mixing of mismatched parts.
Chain Gauge and Guide Bar Groove Tolerances
Chain gauge refers to the precise thickness of the drive links where they seat inside the guide bar groove. Standard industry gauges include .043-inch, .050-inch, .058-inch, and .063-inch. The GLECTG 16-inch combo utilizes a slender .043-inch narrow kerf gauge, while many Oregon combinations, such as the 16-inch S56 or 18-inch bar combos, employ a standard .050-inch gauge. The guide bar rail groove is machined to support the drive link thickness with minimal lateral clearance.
Pairing a chain with an incompatible guide bar groove causes immediate operational failures during bucking or felling. A .050-inch drive link simply will not enter a .043-inch narrow kerf bar groove, locking the chain completely. Conversely, running a .043-inch drive link chain inside a .050-inch or .058-inch bar groove allows excessive side-to-side play. This excessive clearance causes the cutters to tilt under cutting pressure, resulting in crooked kerfs, pinched bars, and rapid rail dishing.
Over extended periods of heavy use, the guide bar groove naturally widens as drive links wear down the internal side walls. When the groove spreads beyond manufacturer tolerances, the chain wobbles and fails to track straight even when properly tensioned. Using a bar groove depth gauge tool helps confirm whether an older guide bar remains suitable for a new chain. Always verify that the replacement chain gauge matches the stamped specification etched into the body of the guide bar.
Drive Link Counts Versus Nominal Bar Length
Nominal bar length describes the usable cutting reach of the guide bar from the powerhead front bumper spike to the bar tip. However, nominal length is an approximation rather than an exact technical measurement. Two different 16-inch guide bars manufactured for different saw models often require completely different drive link counts. For instance, a 16-inch bar on an A041 mount often uses 56 drive links, whereas a 16-inch bar on a different brand chassis might require 55 or 57 links.
The drive link count represents the total number of drive tangs that travel through the bar groove and engage the drive sprocket. The Oregon 14-inch combo requires exactly 50 drive links, the 16-inch combo uses 56 drive links, and the 18-inch setup depends on 62 drive links. If a chain has just one or two links too many, the tensioner pin will reach the end of its travel slot before taking up excess slack. A sagging chain presents a severe derailment risk during bucking operations.
Conversely, a chain with too few drive links will prevent the guide bar from sliding far enough back over the mounting studs to seat the chain around the drive sprocket. Forcing a short chain into place places immense stress on the crankshaft bearings and oil pump driveshaft. When sourcing replacement components, always match the required drive link count indicated on your guide bar stamping rather than relying solely on the advertised nominal length.
Powerhead Engine Displacement and Battery Motor Limits
Chainsaw guide bar length must match the engine displacement or electric motor output of the powerhead. Consumer gas chainsaws with engines under 42 cubic centimeters are typically engineered to drive guide bars between 14 and 18 inches. The Oregon 14-inch, 16-inch, and 18-inch combinations covered here are explicitly rated for saw sizes up to 42 cc. Mounting an oversized 20-inch or 24-inch guide bar on a small engine bogs down the powerhead and risks burning out the centrifugal clutch.
Cordless battery chainsaws operate under strict thermal and electrical load parameters that dictate suitable guide bar dimensions. The GLECTG 16-inch combo lists compatibility across multiple battery platforms, including EGO CS1600 models, DeWalt DCCS670 units, Milwaukee M18 platforms, and Greenworks 40V tools. These cordless powerheads rely on narrow kerf .043-inch setups to reduce the volume of wood fiber removed per cut. This reduced cutting resistance minimizes amp draw from the lithium-ion battery cells, preventing premature thermal overload shutdowns.
Fitting a heavy-gauge or excessively long guide bar onto a cordless platform dramatically reduces cutting runtime and stresses the brushless electronic motor controller. The additional friction generated by a longer bar rail consumes battery power before timber cutting even begins. Operators should always adhere to the maximum recommended bar length specified in the equipment manual to balance cutting speed, balance, and motor longevity.
Mount Pattern Variations Across Major Saw Brands
Different chainsaw manufacturers utilize proprietary or standardized mount pattern families across their model lineups. The Oregon A074 motor mount, found on the Oregon 14-inch combo, is designed specifically for small Stihl saws such as the MS170, 009, 010, and MSE 140 C electric models. Stihl powerheads frequently use an 8.2-millimeter stud slot with a unique tensioner hole spacing that will not accept standard mount bars used by other brands.
In contrast, the widely used A041 motor mount found on the GLECTG 16-inch and Oregon 16-inch and 18-inch combos accommodates a broad variety of homeowner and farm saws. Saws manufactured by Echo (such as the CS310), Craftsman, Homelite, Poulan, Makita, Ryobi, and Wen regularly share this A041 geometry. While these saws originate from different manufacturers, their crankcase castings utilize matching bar stud spacing and oil passage locations.
Larger professional powerheads from Husqvarna and Echo often migrate to larger mount families, such as the D009 large mount, featuring 9-millimeter or larger stud slots. Attempting to interchange an A041 homeowner bar with a commercial D009 powerhead results in severe loose play and oil port misalignment. Always cross-reference the manufacturer part code or industry mount designation before ordering aftermarket guide bars. When tackling smaller cleanup jobs where power equipment is impractical, carrying manual tree branch cutting tools provides a dependable alternative without the complexity of mechanical mounting compatibility.
Lubrication Channel Alignment and Bar Rail Maintenance
Continuous lubrication is mandatory to prevent guide bar rails and saw chain cutters from overheating. Premium guide bars, including the Oregon combos featuring the LubriTec oiling system, utilize engineered oil channels that direct bar oil directly into the chain groove. This specialized geometry catches pumped oil and retains it along the rail path, reducing friction and extending the operating lifespan of both bar and chain. An incompatible bar mount disrupts this oil delivery pathway entirely.
During normal cutting operations, sawdust, chain oil, and wood resin accumulate inside the bar groove and clog the small oil inlet holes. If these ports become obstructed, oil runs down the side of the powerhead case rather than reaching the chain drive links. Routine maintenance requires scraping the guide bar groove with a scrench or dedicated bar cleanout tool whenever you remove the bar. Clear both oil entry ports thoroughly to maintain steady oil flow across the entire bar length.
Guide bar rails also experience mechanical wear from chain chatter and downward bucking pressure, eventually developing sharp metal burrs along the external edges. These burrs cause the bar to bind inside the kerf and can accelerate uneven rail wear. Using a flat file to dress and deburr the bar rails square restores proper chain tracking. Reversible guide bars should be rotated 180 degrees at every chain sharpening or replacement to distribute rail wear evenly across both edges.
Field Safety Checks and Reactive Force Control
Operating a chainsaw safely requires total confidence that your cutting components are assembled and tensioned correctly. Rotational kickback remains one of the most hazardous reactive forces encountered when cutting wood. Kickback occurs when the moving chain around the upper quadrant of the guide bar nose strikes a log, branch, or solid obstruction. Guide bars designed with reduced-radius sprocket noses, such as the low-kickback designs meeting ANSI B175.1 standards on the Oregon combos, help minimize kickback energy for property owners and commercial users alike.
Proper chain tensioning is critical for preventing dangerous chain derailments during limb clearing or bucking cuts. To tension the chain correctly, loosen the bar mounting nuts slightly with a scrench, hold the guide bar nose upward, and adjust the tensioning screw until the tie straps touch the bottom rail. Perform a snap test by pulling the chain downward from the bottom rail; it should snap back firmly against the rail while still sliding freely by gloved hand with the chain brake disengaged.
Personal protective equipment must always accompany chainsaw operation regardless of whether you are making a single cut or clearing storm damage for hours. Operators should wear certified cut-resistant chainsaw chaps conforming to OSHA 1910.266 logging standards, heavy leather or cut-resistant gloves, steel-toed boots, and a forestry helmet system with a wire-mesh face shield and hearing protection. Verifying your guide bar compatibility, mounting hardware, and safety gear before starting the saw ensures an efficient, controlled, and safe cutting experience.
Selecting the correct guide bar for your chainsaw requires matching the exact motor mount pattern, chain pitch, gauge, and drive link count specified by the powerhead manufacturer. Taking time to inspect your existing bar markings and cross-referencing your saw displacement guarantees smooth lubrication, straight cutting kerfs, and long-term equipment reliability in the field.
About the author
Phil Harrington is an astronomy educator, author, and experienced optical equipment reviewer with decades of experience exploring the night sky. He has written extensively about telescopes, binoculars, and astronomical observation, combining technical knowledge with practical guidance that helps astronomy enthusiasts understand and select suitable observing equipment.