
How to Choose Chainsaw Chain: Practical Guide for 2026
Learn how to choose chainsaw chain specifications and matching standards in October 2026 to ensure smooth cutting performance and reliable guide bar fit.
 By Phil Harrington
Updated October 2, 2026
By Phil Harrington
Updated October 2, 2026

Starting up a powerhead only to watch it smoke, bind in the wood, or chatter uncontrollably usually signals an improper cutting assembly. Figuring out how to choose chainsaw chain setups requires balancing physical equipment compatibility with the specific woodcutting tasks you plan to tackle. Installing an incorrect pitch or mismatched gauge can chew through guide bar rails, strip drive sprockets, and dramatically elevate kickback hazards. For minor garden maintenance where heavy motorized equipment is unnecessary, some property owners rely on dedicated pruning saw alternatives to handle basic limb management without complex mechanical setup.
When firewood bucking or storm cleanup demands powered equipment, exact chain sizing is critical for smooth operation and personal safety. Every powerhead and guide bar combination requires a specific drive link count, chain pitch, and drive tang gauge to operate reliably. Learning the physical indicators stamped on your equipment eliminates guesswork when purchasing replacement loops. This practical guide covers the core dimensions, cutter tooth geometries, and maintenance accessories needed to keep your saw operating at peak efficiency.
| Award | Product | TGH Score About TGH ScoreThe TGH Score is our own rating from 0 to 10, based on performance, design and build, ease of use, and value. It reflects independent research and is never influenced by manufacturers, retailers, or affiliate commissions. Learn more › | |
|---|---|---|---|
| Best Overall |
Loggers Art Gens 2 Pack 16 Inch Chainsaw Chains
|
9.2/10 | Buy |
| Best Value |
 Hipa 12 Pack Chainsaw File
|
9.2/10 | Buy |
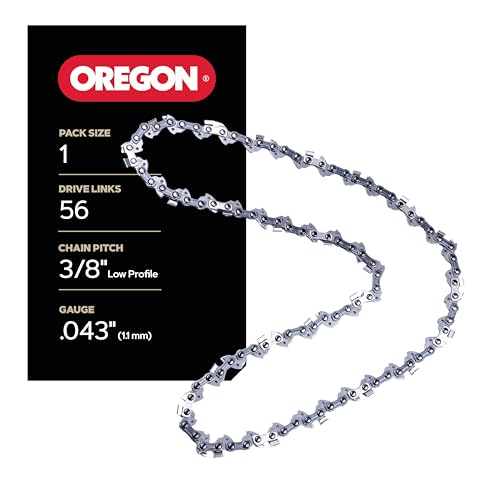 Oregon Chainsaw Chain for 16" Bar, 3/8" LP
|
9.1/10 | Buy | |
| Best Premium |
 Universal Chainsaw Chain Repair Kit
|
9.1/10 | Buy |
| Best Budget |
 Oregon OEM 556418 Chainsaw Bar & Chain Measuring
|
8.8/10 | Buy |
 6 Inch Chainsaw Chain, 5 Pieces Replacement Chains
|
8.8/10 | Buy | |
 Husqvarna X-Cut SP33G 20 Inch Chainsaw Chain
|
8.4/10 | Buy | |
 4 Pack 8 Inch Chainsaw Chain 050" Gauge
|
8.3/10 | Buy | |
 QWORK 3PCS Pocket Chainsaw Breaker with 10 Sets
|
8.0/10 | Buy | |
 Husqvarna S83G 24 Chainsaw chain, 3/8'' Pitch
|
7.8/10 | Buy |
Navigating Chain Specifications for Safe and Efficient Cutting
Selecting the correct saw chain requires matching three physical dimensions: chain pitch, drive link gauge, and overall drive link count. If any measurement deviates from manufacturer specifications, the chain will jam against the drive sprocket, fail to seat, or derail. Beyond dimensional compatibility, choosing between semi-chisel and full-chisel cutters determines cutting speed in dirty bark or clean hardwoods. A methodical check ensures your powerhead cuts efficiently while preserving safety margins.
Many woodcutters encounter trouble by purchasing replacement loops based solely on advertised bar length. A 16-inch bar from one brand often requires a different drive link count or gauge than another. Relying strictly on nominal inch ratings leads to loose chains, oil starvation, and accelerated bar rail wear. Checking the exact mechanical specifications prevents costly equipment damage.
The Essential Specification Triad: Pitch, Gauge, and Drive Links
Chain pitch represents the distance between drive links, calculated by measuring the span across any three consecutive rivets and dividing by two. Common pitch sizes include 1/4 inch, .325 inch, 3/8 inch Low Profile (LP), standard 3/8 inch, and .404 inch. Low-profile 3/8-inch chains typically equip electric and compact gas saws, whereas .325-inch and standard 3/8-inch setups power ranch models. The replacement chain pitch must match your drive sprocket and nose sprocket exactly to avoid destroying sprocket teeth.
Drive link gauge defines the thickness of the lower drive tangs fitting the guide bar track. Common gauge sizes are .043 inch (1.1 mm), .050 inch (1.3 mm), .058 inch (1.5 mm), and .063 inch (1.6 mm). Narrow-kerf setups like the Oregon Chainsaw Chain for 16″ Bar, 3/8″ LP use a .043-inch gauge to lower cutting resistance on saws up to 42cc. Meanwhile, standard 16-inch loops like the Loggers Art Gens 2 Pack 16 Inch Chainsaw Chains use a .050-inch gauge. Installing a .043-inch chain into a .050-inch groove causes excessive slop, uneven kerfs, and accelerated rail wear.
Drive link count is the number of drive tangs forming the complete loop. While bar length indicates usable reach, drive link count determines whether the loop fits the tensioner range. A 16-inch bar may require 55, 56, or 57 drive links depending on the mount pattern. When stamped markings are unreadable, a pocket tool like the Oregon OEM 556418 Chainsaw Bar & Chain Measuring helps operators verify pitch, groove width, and gauge in the field.
Locating and Interpreting Guide Bar Tail Markings
Most original guide bars feature factory stampings near the motor mount tail. Removing the clutch cover and clearing away sawdust reveals etched alphanumeric codes. These stampings specify the guide bar length, pitch, gauge, and required drive link count. For instance, a stamping like 160SDEA041 indicates a 16-inch bar with specific pitch and gauge codes matched to an A041 mount.
Friction wear and corrosion can render tail markings illegible on older equipment. Operators should manually count each drive link on the existing loop to determine length. Hanging the chain from an index finger and marking the starting tang with grease pencil prevents counting errors. If the original chain is missing, checking the owner manual or measuring the bar slot helps confirm proper loop dimensions.
Drive sprocket wear should always be inspected during a chain replacement. Powerheads use either fixed spur sprockets or replaceable rim sprockets to drive the cutting loop. Running a new chain across a grooved sprocket damages the fresh drive tangs immediately. If sprocket wear grooves exceed .020 inch, replace the sprocket to ensure smooth engagement and prevent premature chain stretch.
Cutter Profiles: Matching Semi-Chisel and Full-Chisel to Timber Conditions
Cutter geometry dictates cutting speed and how long an edge survives in abrasive timber. Semi-chisel cutters feature a rounded radius between the top and side plates. This rounded profile distributes impact stress, staying sharp longer in dirty bark, seasoned logs, or sandy storm debris. Loops like the Husqvarna X-Cut SP33G 20 Inch Chainsaw Chain and Husqvarna S83G 24 Chainsaw chain, 3/8” Pitch use semi-chisel teeth to maintain dependable cutting performance across rugged farm tasks.
Full-chisel chains feature square, pointed corners engineered to sever clean wood fibers rapidly. The aggressive corner slices through clean green hardwoods with minimal drag. However, that razor point dulls quickly when encountering dirt, mud, or grit embedded in tree bark. Contact with sandy soil or frozen timber can blunt full-chisel cutters in seconds, requiring immediate field sharpening.
Choosing between these profiles depends on timber condition rather than maximum theoretical speed. Firewood cutters bucking dirty logs achieve better productivity with semi-chisel chains because they spend less time filing. In clean standing timber, full-chisel loops offer superior chip evacuation and faster cutting. While chainsaws tackle rough bucking, woodworkers processing milled lumber often rely on saws designed for cutting lumber when precise, smooth edges are necessary.
Sizing Considerations Across Tool Platforms: Mini Saws to Heavy Bucking Bars
Saw chain specifications shift significantly between handheld pruning saws and high-displacement gas powerheads. Compact 6-inch cordless saws use miniature narrow-kerf chains like the 6 Inch Chainsaw Chain, 5 Pieces Replacement Chains to conserve battery runtime. These small chains have shallow profiles matched to low-torque electric motors. Installing standard homeowner chains onto miniature pruning tools will stall the motor assembly.
Pole saws focus on smooth cutting and low vibration during overhead branch management. An 8-inch pole saw chain like the 4 Pack 8 Inch Chainsaw Chain 050″ Gauge typically uses a 3/8-inch LP pitch with 33 drive links. Because overhead cuts carry binding risks, operators sometimes alternate with manual tools like hand saws for trimming limbs in congested canopy branches. Keeping low-profile chains on pole saws prevents chatter and stabilizes elevated cuts.
Mid-size and large gas chainsaws require heavier chain chassis to handle substantial engine torque. Saws like the Husqvarna 450 Rancher run .325-inch pitch loops with 80 drive links on 20-inch bars for balanced firewood bucking. Heavy saws such as the 455 or 460 Rancher step up to standard 3/8-inch pitch with 84 drive links on 24-inch bars. Matching chain strength to engine displacement prevents link breakage and premature stretching under load.
Safety Engineering: Low-Kickback Features and ANSI Compliance
Rotational kickback represents a serious hazard, occurring when cutters contact wood in the upper quadrant of the guide bar nose. If a cutter snags in this zone, reactive forces drive the powerhead back toward the operator. Manufacturers produce low-kickback chains meeting ANSI B175.1 safety standards to reduce this danger. These chains incorporate bumper drive links and ramped depth gauges that limit bite depth around the nose radius.
Bumper drive links on loops like the Oregon 16-inch low-profile chain deflect wood fibers away from the cutter corner. Smoothing this entry prevents teeth from grabbing wood too aggressively around the bar nose. Consumer chainsaws below 62cc typically specify low-kickback chains to protect operators from rotational kickback. This design provides smoother cutting action without sacrificing basic firewood processing performance.
Non-safety full-chisel chains are utilized in specialized felling and plunge-cutting, but they require seasoned operator technique. For firewood cutting, yard clearing, and storm cleanup, ANSI-compliant low-kickback chains provide a critical safety buffer. Operators should always pair low-kickback chains with an active inertia chain brake. Using certified safety chaps, eye protection, and gloves remains essential on every cutting job.
Chain Tensioning, Drive Sprocket Alignment, and Initial Fit Verification
Installing a replacement chain begins by loosening bar nuts and retracting the tensioner pin. Slide the guide bar rearward and loop the chain over the drive sprocket, verifying cutter teeth face forward along the top rail. Seat the drive links into the bar groove and engage the tensioner pin in the bar slot. Reattach the clutch cover finger-tight to permit bar movement during tensioning.
Support the bar nose upward while turning the tensioner screw clockwise. Proper tension leaves drive links seated flush against the lower bar rail without sagging belly slack. Performing a quick snap test by pulling the chain downward confirms whether it snaps back firmly into the rail. Once tension is set, tighten the bar nuts securely with a scrench while maintaining upward pressure on the bar tip.
Operational verification confirms proper chain travel and oiler function before cutting logs. Start the saw and rev the engine briefly while pointing the bar nose at clean scrap cardboard. A visible line of thrown oil should appear within seconds, confirming open oiler ports. Running a dry cutting assembly overheats rails, ruins cutters, and causes immediate chain stretching.
Maintenance Equipment: File Sizing, Depth Gauges, and Field Repairs
Routine sharpening preserves chain life and maintains efficient chip clearance. Operators must match file diameter to chain pitch to maintain correct cutter hook angles. The Hipa 12 Pack Chainsaw File kit includes sizes like 5/32 inch for 3/8-inch LP, 3/16 inch for .325-inch, and 7/32 inch for standard 3/8-inch loops. Using an improper file diameter deforms cutter geometry, causing rapid dulling or chatter.
Sharpening cutter teeth without maintaining depth gauges leads to sluggish woodcutting. Depth gauges control how deeply cutters penetrate timber on each pass. Utilizing a flat file with a depth gauge tool maintains clearance between .025 inch and .030 inch. If depth gauges remain too high, cutters cannot bite effectively, producing fine dust instead of coarse chips.
Field repair kits rescue workdays when chains encounter embedded wire or snap links. Tools like the Universal Chainsaw Chain Repair Kit and QWORK 3PCS Pocket Chainsaw Breaker with 10 Sets allow operators to press out broken rivets and fit fresh joiner links. Having matched joiner straps for .325-inch and 3/8-inch LP loops keeps spare chains serviceable. Replacement links must always match chassis pitch and gauge before peening.
Operational Diagnostics: Identifying Mismatched or Failing Chains
Recognizing cutting symptoms helps diagnose assembly mismatches before serious damage happens. If a saw pulls sideways or binds in curved cuts, inspect cutter lengths and bar rails. Uneven hand sharpening creates shorter teeth on one side, pulling the cut toward the longer cutters. Worn bar rails that have splayed open also permit chain tilting, producing wandering kerfs under heavy pressure.
Scorched rails and smoking bars signal intense friction from overtightening or poor oil delivery. Excess tension forces drive links hard against bar channels, generating damaging heat. A loose chain rattles and risks jumping the track, peening drive tangs. Always allow a hot chain to cool before readjusting tension, as tightening expanded steel can warp components upon cooling.
Sawdust texture offers an immediate readout of cutting efficiency. A sharp, properly matched chain produces coarse, uniform wood chips that eject cleanly. Fine, powdery dust indicates dull cutters, improper filing angles, or unfiled depth gauges. Forcing a dull chain into wood strains the engine and overheats the clutch assembly.
Matching a chainsaw chain requires respecting powerhead and guide bar specifications. Operators should verify pitch, gauge, and drive link counts using manual specs, tail stampings, or measuring gauges. Selecting semi-chisel cutters for dirty timber or full-chisel teeth for clean hardwood ensures predictable cutting performance. Proper matching guarantees the entire cutting system functions safely.
Regular maintenance preserves cutting equipment and protects operator safety. Keeping a dedicated file kit, depth gauge plate, and spare links nearby enables quick field adjustments. With correct tension, steady lubrication, and matched chain dimensions, your powerhead will deliver reliable cuts across any bucking, limbing, or property maintenance task.
About the author
Phil Harrington is an astronomy educator, author, and experienced optical equipment reviewer with decades of experience exploring the night sky. He has written extensively about telescopes, binoculars, and astronomical observation, combining technical knowledge with practical guidance that helps astronomy enthusiasts understand and select suitable observing equipment.