
How to Replace a Wooden Shovel Handle: A Practical Repair Guide for 2026
Learn how to replace a wooden shovel handle safely with this step-by-step repair guide for November 2026, covering socket extraction, grain alignment, and riveting.
 By Clint DeBoer
Updated November 5, 2026
Prying against stubborn tree roots or levering heavy rocks out of hardpan soil often places extreme mechanical stress on the neck of a garden tool. A sudden snap near the steel socket can instantly halt an afternoon of landscape work, leaving behind a jagged stub and a functional steel blade. Understanding how to replace a wooden shovel handle allows homeowners and gardeners to restore a favorite digging tool without spending unnecessary money on a completely new shovel. Quality steel heads often outlast multiple wooden shafts, making re-hanging a blade one of the most rewarding and sustainable skills in yard care. Learning the foundational anatomy of spades and shovels helps identify exactly how the original shaft was secured so you can prepare for a clean rebuild.
Successful handle restoration relies on selecting the right wood species and respecting structural grain alignment under load. Hardwood shafts made from straight-grained ash wood provide the natural flex and shock absorption needed to handle repetitive ground strikes without shattering. Inspecting the socket depth, removing stubborn factory rivets safely, and shaping the replacement tenon ensure the tool maintains proper balance and mechanical leverage. By replacing damaged timber with a properly fitted shaft, you restore digging leverage, protect your hands from splintering, and keep durable forged steel working in your garden for decades to come.
| Award | Product | TGH Score About TGH ScoreThe TGH Score is our own rating from 0 to 10, based on performance, design and build, ease of use, and value. It reflects independent research and is never influenced by manufacturers, retailers, or affiliate commissions. Learn more › | |
|---|---|---|---|
| Best Overall |
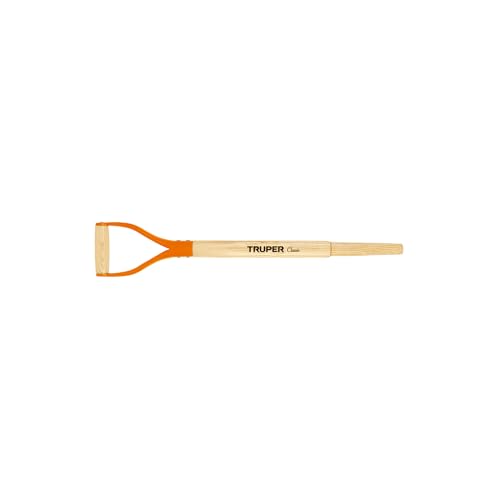
Truper 28-Inch Ash Wood Replacement Shovel Handle
|
9.1/10 | Buy |
| Best Budget |
 Trivolein 1.26-Inch Shovel D Grip Replacement |
8.9/10 | Buy |
 Saycker 1-1/4 Inch Metal and Wood D-Grip Shovel |
8.9/10 | Buy | |
| Best Value |
 Truper MG-PL 43-Inch Replacement D-Handle |
8.9/10 | Buy |
| Best Premium |
 Rocky Mountain Goods 54-Inch Shovel Handle |
8.8/10 | Buy |
 GRETJOB 41-Inch Wood Shovel Handles (3-Pack) |
8.8/10 | Buy | |
 Truper 26-Inch Ash Wood Replacement Shovel Handle |
8.6/10 | Buy | |
 Gisafai 28.7-Inch Shovel Handles, 4-Pack |
8.6/10 | Buy | |
 Truper 41-Inch Wood Replacement Handle for Long |
8.0/10 | Buy | |
 KH866 14-Inch Wooden D-Grip Shovel Handle |
7.8/10 | Buy |
Truper 28-Inch Ash Wood Replacement Shovel Handle
The Truper MG-PY is a 28-inch replacement handle crafted from polished ash wood and fitted with an anti-rotation Y-grip for Truper Classic shovel heads. It offers an economical, durable way for gardeners, homeowners, and landscapers to restore a reliable digging tool without buying a brand-new shovel.
Pros
- Quality ash wood construction is lacquered and waxed for smooth handling and moisture resistance
- Anti-rotation fixing mechanism prevents the Y-grip from loosening or twisting during heavy transfer tasks
- Restores compatible Truper shovel heads to service at a fraction of the cost of a new tool
- Compact 28-inch length offers excellent control in tight spaces and garden beds
Cons
- Engineered specifically for Truper Classic Y shovels and may not fit third-party shovel sockets without modification
- Does not include replacement socket rivets or mounting hardware in the package
- Ash hardwood requires dry storage to prevent weathering and moisture degradation over time
Trivolein 1.26-Inch Shovel D Grip Replacement
The Trivolein Shovel D Grip Handle is a heavy-duty iron and wood replacement grip engineered for 1.26-inch (32mm) shafts. It delivers sturdy anti-rotation stability and includes four mounting rivets, making it an ideal upgrade for anyone repairing cracked or worn tool handles.
Pros
- Sturdy iron and wood build offers far greater durability than standard brittle plastic handles
- Includes four 3cm mounting rivets for direct mechanical installation
- Three-point anti-rotation design helps keep the handle aligned under twisting loads
- Lightweight 300-gram frame maintains proper tool balance during extended yard work
Cons
- Fixed 1.26-inch (32mm) inner socket requires careful measuring and will not fit larger diameter or sharply tapered handles
- Rivet installation requires basic workshop tools such as a drill and hammer or rivet setter
- Natural wood component may require periodic oiling or dry indoor storage to prevent outdoor weathering
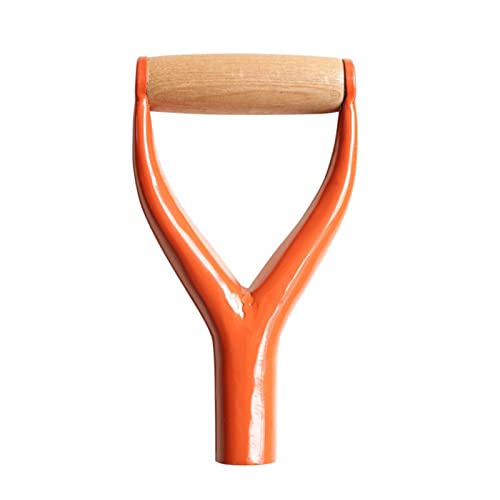
Saycker 1-1/4 Inch Metal and Wood D-Grip Shovel
This sturdy iron and wood D-grip replacement handle restores broken garden spades, forks, and snow pushers with a standard 1-1/4-inch shaft diameter. It provides reliable hand control and improved lifting posture for homeowners and gardeners seeking an economical tool repair.
Pros
- Iron and wood build offers stronger impact resistance than all-plastic replacement grips
- Standard 1-1/4 inch socket fits a wide variety of residential yard and snow tool shafts
- Lightweight design preserves the natural swing and scooping balance of your shovel
- Helps restore broken, cracked, or weathered tool handles at a fraction of full replacement cost
Cons
- Requires careful measurement of your existing shaft diameter to ensure a secure 1.22-inch fit
- Iron and wood components may require indoor storage to protect against surface rust and moisture weathering
- May require an added mechanical fastener or through-screw for high-leverage prying tasks
Truper MG-PL 43-Inch Replacement D-Handle
The Truper MG-PL is a 43-inch replacement handle designed to restore damaged long D-handle digging and transfer shovels rather than replacing the entire tool. It offers an economical, ergonomic repair solution for homeowners, gardeners, and landscapers looking to extend the working life of their favorite shovel heads.
Pros
- Cost-effective way to restore a favorite shovel head without purchasing a complete replacement tool.
- Extended 43-inch shaft length combines the leverage of a longer handle with the directional stability of a D-grip.
- Lightweight build at approximately 1.54 pounds minimizes unnecessary extra tool weight.
- Brown finish complements traditional wooden tool handles and workshop aesthetics.
Cons
- Fitting and socket tapering may require sanding, trimming, or drilling depending on your specific shovel head socket design.
- Mounting hardware such as rivets or through-bolts is not listed as included and may need to be sourced separately.
- Not suitable for tools requiring standard short 27-to-30-inch D-handles or straight-handle configurations.
Rocky Mountain Goods 54-Inch Shovel Handle
Built to revive worn tools, this 54-inch hardwood replacement handle features a standard 6-inch chuck and 3/4-inch eye for socket-style shovel heads. An integrated hook allows for easy wall hanging, though fitting it to some tool heads may require manual alteration.
Pros
- Durable hardwood construction resists heavy outdoor strain
- Built-in hook enables convenient vertical storage
- Standard socket design fits various shovel heads
- Generous 54-inch length offers strong leverage
Cons
- May require manual shaping for an exact fit
- Not compatible with non-socket shovel heads
GRETJOB 41-Inch Wood Shovel Handles (3-Pack)
Made from durable ash wood, these 41-inch replacement handles feature a tapered end to simplify fitting into standard shovel collars. This multi-pack provides a practical way for gardeners and property owners to repair broken tools rather than replace entire assemblies.
Pros
- Durable ash wood construction holds up to frequent use
- Pre-tapered tip allows for quicker installation
- Convenient three-pack keeps spare handles available
- Standard 1.5-inch diameter fits common solid shovel heads
Cons
- Straight shaft lacks an integrated ergonomic D-grip
- May require custom shaving for non-standard tool sockets
Truper 26-Inch Ash Wood Replacement Shovel Handle
The Truper 26-Inch Ash Wood Replacement Handle restores broken Truper T-2000 Y shovels with a durable, waxed ash shaft and an ergonomic offset Y-grip. It is an affordable, practical repair solution for gardeners, homeowners, and landscapers wanting to rebuild a dependable digging tool.
Pros
- Durable ash hardwood construction finished with polish, lacquer, and wax for weather resistance.
- Offset Y comfort grip provides positive hand placement and torque control during digging and lifting.
- Exact 26-inch replacement profile matches original Truper T-2000 shovel specifications.
- Significantly more affordable than purchasing a complete new contractor or garden shovel.
Cons
- Engineered specifically for Truper T-2000 models, requiring verification of socket fit before attempting universal tool repairs.
- Requires manual installation and fastening into your existing shovel socket.
- Shorter 26-inch D-handle layout provides less standalone standing leverage compared to full-length straight shovel shafts.
Gisafai 28.7-Inch Shovel Handles, 4-Pack
This multi-pack offers an easy way to restore worn lawn and garden tools without replacing the entire implement. Each 28.7-inch waxed wood shaft features an ergonomic Y-shaped grip designed to optimize leverage and reduce physical fatigue.
Pros
- Waxed and lacquered wood enhances outdoor durability
- Four-pack bundle handles multiple tool repairs
- Ergonomic grip design minimizes wrist and hand strain
- Pre-drilled hole design facilitates tool head alignment
Cons
- Compact 28.7-inch length may feel short for taller users
- Requires manual pinning to ensure a secure head connection
Truper 41-Inch Wood Replacement Handle for Long
The Truper MG-PL-P 41-inch wood replacement handle revitalizes damaged shovels with a sturdy wooden shaft and protective finish. It serves as an economical repair solution for homeowners and landscapers maintaining compatible Truper long D-handle tools.
Pros
- Cost-effective alternative to replacing an entire round-point or transfer shovel
- 41-inch length offers an effective balance between straight-shaft reach and D-handle lift control
- Includes mounting screw hardware for direct and secure socket attachment
- Lightweight 1.34-pound wooden build prevents the shovel from feeling top-heavy
Cons
- Engineered specifically for Truper long D-handle shovel models and may not fit third-party sockets without custom fitting
- Wood construction requires dry storage and occasional maintenance to avoid weathering over time
- Does not include replacement rivets or blade hardware beyond the single attachment screw
KH866 14-Inch Wooden D-Grip Shovel Handle
Crafted from solid wood, this 14-inch replacement handle gives worn spades and forks a quick refresh with an ergonomic D-shaped grip. Its tapered tip simplifies attachment, making it a practical fix for small digging and yard tools.
Pros
- Sturdy solid wood construction
- Ergonomic D-shaped grip reduces hand strain
- Smooth polished finish without burrs
- Tapered tip enables straightforward installation
Cons
- Short 14-inch length provides minimal leverage
- Requires manual bonding method for secure attachment
The Complete Technical Guide to Wooden Shovel Handle Replacement
Replacing a broken wooden shovel handle is a practical repair that restores a favorite digging tool to full working order. The task requires steady hand fitting, proper wood grain alignment, and secure hardware seating rather than advanced woodworking equipment. Quality steel heads often outlive multiple shafts, making replacement both cost-effective and environmentally sound. Before removing the damaged timber, understanding the mechanical connection between the metal socket and the replacement shaft ensures a tight, long-lasting fit.
Diagnosing Handle Failure Modes and Socket Construction
Wooden shovel handles typically fail right where the timber enters the steel socket neck. This transition point bears the highest bending forces whenever you lever against compacted clay, rocks, or stubborn roots. When prying forces exceed the natural flex of the wood fibers, or when trapped moisture causes internal decay, the shaft snaps along the collar line. Inspecting the fracture surfaces helps reveal whether excessive side-loading, grain runout, or neglected outdoor storage caused the failure.
Socket fabrication directly governs how a replacement handle must be seated and secured. Heavy-duty tools often feature a solid-shank socket forged from a single piece of steel, offering strong sidewalls that support the wood tenon under severe leverage. Stamped shovels usually feature an open-back design where the metal curves into a hollow channel, leaving part of the wood shaft exposed to soil moisture. Inspecting the shovel socket and ferrule design confirms whether your tool uses an open frog, a welded closed-back tube, or a crimped reinforcing ring.
Selecting the Replacement Timber and Wood Species
North American white ash remains the benchmark wood species for manual earthmoving equipment because of its excellent strength and elastic flexibility. Ash naturally absorbs sudden shock when the blade strikes buried stone, protecting your wrists and forearms from painful impact jarring. Denser hickory provides exceptional prying toughness but adds dead weight that can tire your shoulders during prolonged shoveling sessions. Replacement shafts made from unverified generic hardwoods often lack continuous longitudinal fibers, increasing the risk of brittle fractures under moderate digging loads.
Handle geometry must also match your intended landscape tasks and physical height. Long straight shafts measuring 48 to 54 inches provide broad reach and upright leverage for open-ground excavation and bulk material moving. Shorter shafts measuring 26 to 30 inches paired with D-shaped or Y-shaped grips offer superior control in confined trenches, planting holes, or post holes. When choosing replacement timber, understanding the functional differences between spades and shovels helps you pair flat-bladed edging tools with upright shafts and curved lifting blades with balanced lift handles.
Growth ring orientation along the replacement timber demands close visual inspection before installation. Check the end grain of the shaft to verify that the annular rings run parallel to the direction of digging force. When grain lines cross through the shaft at a sharp diagonal angle, known as grain runout, the wood can split along that natural shear line under heavy prying. High-grade replacement handles from manufacturers like Truper or Rocky Mountain Goods feature straight, continuous grain patterns aligned to resist bending stresses along the primary digging plane.
Essential Workshop Tools and Digging Safety
Replacing a shovel handle requires only basic workshop tools and a secure work surface. A sturdy bench vise fitted with protective soft jaws holds the steel blade securely without scratching or warping the collar. You will need a center punch, high-speed drill bits, an electric drill, and a ball-peen hammer for fastener removal and installation. A half-round wood rasp, medium sandpaper, a dead-blow mallet, and boiled linseed oil complete the required restoration kit.
Personal protective equipment is essential during hardware extraction, wood shaping, and tool assembly. Always wear impact-rated eye protection when drilling metal rivets, driving steel punches, or cutting seasoned hardwood. Sturdy work gloves protect your hands from sharp metal burrs, wood splinters, and slipping rasp teeth. Before taking your restored tool outside for deep excavation or trenching, call 811 to have local underground utility lines marked safely.
Removing Rivets and Extracting the Broken Wood Core
Removing the stubborn stub of the broken handle starts with neutralizing the factory retaining hardware. Most traditional shovels secure the handle within the steel socket using a peened steel rivet, a through-pin, or a heavy-duty screw. If your tool uses a threaded fastener, back it out cleanly using the appropriate screwdriver or wrench. When dealing with factory peened rivets, file or grind the rounded head flat, center punch the middle, and drill carefully through the rivet shank with a bit sized just smaller than the fastener diameter.
Once the rivet head is drilled away, use a pin punch and hammer to tap the remaining fastener body out of the socket. Avoid striking the metal socket collar directly with a steel hammer, as thin collars can easily flare or bend out of round. Never attempt to burn the broken wood core out of the socket with a torch or fire pit. Excessive heat ruins the temper and hardness of heat-treated blade steel, leaving the metal soft and prone to bending.
Extracting the sheared wood stub from the socket collar is straightforward with the right mechanical leverage. Drive a long, heavy wood screw deeply into the center of the broken timber core. Clamp the protruding screw head tightly in your bench vise, then tap the back of the shovel blade with a wooden block to pull the stub free. If the wood remains stuck, drill several relief holes through the core with a spade bit until the collapsed wood fibers slide out easily.
Sizing and Profiling the Replacement Tenon
New replacement handles feature a pre-machined tenon, often called a chuck, designed to fit standard shovel collars. Manufacturing tolerances vary across tool brands, so nearly every replacement handle requires custom fitting. Measure the inside diameter and depth of your shovel socket using calipers or a marked wooden dowel. Compare these measurements against the tenon profile of your new replacement shaft to identify where excess wood must be removed.
Shape the wooden tenon gradually using a half-round wood rasp, working evenly around the circumference of the timber. Test the fit frequently by pushing the tenon into the socket and checking where the wood rubs tight against the metal. Shave down the high spots until the tenon slides snugly into the collar without binding or rocking sideways. The goal is continuous, uniform contact across the entire interior wall of the metal collar, which distributes digging stress evenly during heavy use.
Maintain the natural taper of the socket as you shape the timber, avoiding an abrupt shoulder where the tenon meets the main shaft. A sharp right-angle shoulder creates a severe stress concentration point where bending forces will cause premature handle failure. Blend the transition smoothly using 80-grit sandpaper, creating a clean taper that nests deeply into the socket. A proper friction fit should hold the shovel head firmly in place even before driving any retaining fasteners.
Aligning Blade Lift Angles and Seating the Shaft
Proper blade alignment is essential for comfortable digging posture and balanced lifting control. Before driving the handle into its final position, verify that the curve of the shaft aligns square with the dished face of the blade. For tools equipped with a D-grip or Y-handle, ensure the handgrip crossbar sits perfectly perpendicular to the digging plane of the blade edge. An off-center grip forces your wrists into awkward angles during lifting, causing premature forearm fatigue and poor scooping control.
Seat the wooden shaft firmly into the socket using controlled impact rather than aggressive force. Rest the shovel blade flat on a clean scrap board on the workshop floor to protect the metal cutting edge. Drive the handle downward into the socket by tapping the butt end with a dead-blow mallet or by tapping the assembled tool firmly against the floor. Listen for the sound of impact to change from a hollow rattle to a sharp, solid thud, indicating the tenon has reached the bottom of the socket cavity.
Verify that the socket collar sits flush against the shaped wood without visible gaps or tilting. If the blade exhibits any wobble or play, remove the shaft immediately to check for debris or high spots inside the socket. Driving retaining hardware into an improperly seated or crooked shaft can permanently split the new wood tenon. Taking a few extra minutes to confirm concentric seating ensures the tool handles heavy soil loads without loosening.
Fastening Hardware and Riveting the Socket Collar
Securing the seated handle requires hardware that resists continuous vibration and heavy withdrawal loads. With the handle fully seated, use the original holes in the steel socket as drill guides to bore clean pilot holes through the wood tenon. Select a drill bit that matches the fastener diameter, holding the drill strictly perpendicular to the socket axis so the bit exits cleanly through the opposing hole. Clear away all loose wood shavings from the hole before inserting the fastener.
For a factory-style installation, insert a solid steel rivet through the aligned holes, trimming the shank so approximately one-eighth of an inch extends past the collar. Rest the factory head of the rivet against an anvil or heavy vise jaw, then peen the protruding shank using the rounded end of a ball-peen hammer. Work the hammer in a circular motion around the pin perimeter to expand the metal, clamping the socket tightly around the wood. Alternatively, installing a high-grade steel bolt with a nylon locknut provides strong clamping force and allows easy tightening if the wood shrinks.
If you are replacing a broken D-grip on a short shovel shaft, similar fastening rules apply to the upper collar. Modern replacement grips made from stamped metal and wood slide over standard 1-1/4 inch shafts and require secure pinning. Fasten the grip collar firmly with the supplied rivets or through-screws, verifying that the crossbar cannot rotate under twisting loads. A loose or spinning upper grip compromises user safety when lifting heavy loads of wet soil, aggregate, or slush.
Conditioning the Hardwood and Preventing Moisture Decay
Fresh replacement handles require protective surface nourishment to prevent moisture absorption and grain weathering. Lightly sand the entire length of the new ash or hickory shaft with 120-grit sandpaper to remove shipping wax, dirt, or rough spots. Wipe away all sanding dust with a clean, dry cloth, then apply a liberal coat of boiled linseed oil using a cotton rag. Allow the oil to soak into the wood grain for twenty minutes before wiping away any unabsorbed excess.
Boiled linseed oil cures inside the wood pores, creating a water-resistant, flexible barrier that prevents timber from drying out, cracking, or splintering. Unlike brittle clear coats or varnishes that chip and cause painful blisters on bare hands, an oil-rubbed finish provides a smooth, tactile surface that ages gracefully. Apply two thin coats during the initial repair, allowing adequate drying time between applications, and rub in a fresh coat at the beginning of each digging season.
Proper tool storage habits preserve your newly hung handle for many years of reliable yard service. Store digging tools in a dry, well-ventilated shed or garage, hanging them by the blade or a dedicated hook rather than resting them directly on damp concrete. Always scrape off wet soil and clay from the blade and socket after use, as trapped dirt holds moisture against the metal and rots the wood tenon. Periodically inspect the socket hardware, snugging the fasteners if seasonal humidity changes cause slight wood shrinkage.
Structural Load Testing and Safe Leverage Limits
Before using your restored shovel for heavy earthmoving, perform a controlled structural verification test in loose soil. Push the blade firmly into the ground with your foot, then apply steady backward pressure on the upper shaft. Watch the socket connection closely to confirm there is no creaking, movement at the fastener hole, or play inside the collar. A properly fitted replacement handle feels rigid and unified, transferring your body weight directly to the digging edge.
Recognizing the physical leverage limits of manual digging tools prevents unexpected handle breaks and personal injuries. Even the highest-grade ash wood handle cannot withstand unlimited prying leverage against immovable rocks or heavy tree taproots. Using a shovel as a heavy-duty pry bar concentrates severe bending torque directly at the socket neck, which can snap even brand-new hardwood. If an obstruction resists reasonable prying effort, switch to a solid steel digging bar or a mattock to loosen the object safely.
Good lifting mechanics protect both your newly restored tool and your lower back from painful injury. Stand with your feet shoulder-width apart, bend your knees, and hinge at the hips to keep the shovel load close to your center of gravity. Lift smoothly using the strength of your legs rather than arching your spine, avoiding twisting motions while pitching heavy soil. With a properly fitted ash handle and sensible digging posture, your restored shovel will provide years of dependable, comfortable service across all your garden and landscaping projects.
Replacing a wooden shovel handle gives new life to quality steel tools while keeping repair costs low. Taking the time to properly extract old rivets, shape the replacement tenon, and align the blade geometry ensures reliable digging performance. Regular oil conditioning protects the natural wood fibers from weathering and splintering across changing seasons. Master this straightforward maintenance skill, and your favorite shovel will remain a dependable garden workhorse for decades to come.
About the author

Clint DeBoer is a longtime tool-industry editor and reviewer with decades of experience in technical media, product evaluation, and hands-on testing. His work has emphasized objective testing methods for power tools, accessories, outdoor equipment, and professional gear, with particular attention to performance, technology, usability, and practical value for professionals and serious DIY users.