
How to Start Makita Chainsaw: Practical Step-by-Step Guide for 2026
Master how to start makita chainsaw in October 2026 with our clear sequence on battery installation, main power activation, and troubleshooting safety tips.
 By Tony Flanders
Updated October 2, 2026
By Tony Flanders
Updated October 2, 2026
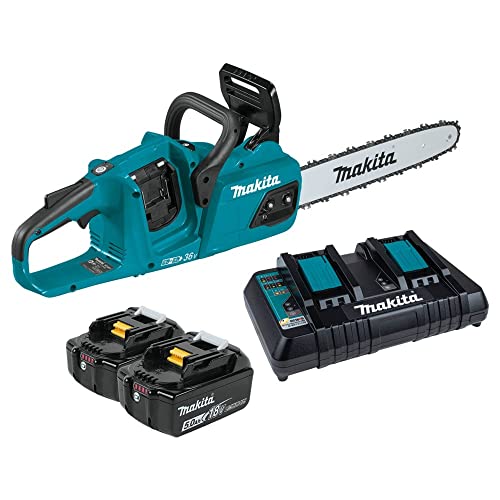
Cordless battery power has transformed modern yard maintenance by eliminating the finicky carburetors, fuel mixing, and stubborn pull cords common to small two-stroke gas powerheads. Learning how to start makita chainsaw equipment requires understanding an electronic sequence rather than yanking an engine recoil rope. Makita battery-powered chainsaws rely on dual 18V lithium-ion battery packs working in series to deliver 36V direct-drive performance. While smaller yard clearing projects might occasionally call for manual pruning saws for tree trimming, a modern brushless battery chainsaw tackles fallen logs and hefty limb cleanup with immediate cutting speed. Squeezing full power out of these tools starts with knowing the exact interlock sequence and safety features built into the powerhead.
Many operators encounter confusion when transitioning from gasoline equipment to modern cordless brushless platforms because safety switches behave differently. Makita incorporates electronic auto power-off features, inertia chain brakes, and lock-off levers designed to protect the user from accidental throttle engagement. If you miss a single step in the activation sequence, the brushless direct-drive motor simply will not turn the guide bar. Reviewing the basic mechanical checks, battery seating procedures, and electronic power switches ensures your saw fires up safely on the first attempt every time you head into the yard.
| Award | Product | TGH Score About TGH ScoreThe TGH Score is our own rating from 0 to 10, based on performance, design and build, ease of use, and value. It reflects independent research and is never influenced by manufacturers, retailers, or affiliate commissions. Learn more › | |
|---|---|---|---|
| Best Overall |
Makita XCU07PT 18V X2 (36V)
|
8.8/10 | Buy |
 Makita XCU04PT1 36V (18V X2)
|
8.1/10 | Buy | |
| Best Budget |
 Makita XCU04Z 18V X2 (36V)
|
7.8/10 | Buy |
Mastering the Makita Chainsaw Startup Procedure and Operation
Operating a cordless Makita chainsaw provides quiet cutting power and zero emissions, but the digital starting process requires specific mechanical and electrical inputs. Unlike gas-powered saws that rely on choke levers and pull ropes, these brushless powerheads demand a precise sequence of battery connections, safety switches, and power toggles. Following the correct procedure ensures smooth motor engagement while preventing accidental throttle activation in the yard.
Essential Pre-Start Safety Checks and Personal Protective Equipment
Before touching any power switches, prepare your personal protective equipment and establish a clean work area. Chainsaw chaps compliant with OSHA 1910.266 regulations offer crucial cut-retardant fiber protection against accidental chain contact on your legs. A forestry helmet fitted with a mesh face shield and ear protection shields your eyes from flying hardwood chips while muffling high-frequency gear noise. Heavy-duty cut-resistant gloves provide a firm grip on the rubberized handles and protect your fingers during chain inspection.
Inspect the physical condition of the cutting assembly while the power is completely disconnected. Check the guide bar for metal burrs along the rails and confirm that the saw chain sits squarely inside the bar groove. Ensure the front handguard is clean and free of packed wood chips that might interfere with chain brake movement. Taking thirty seconds to examine the hardware helps prevent mechanical binding or sudden derailment once the brushless direct-drive motor spins up.
Clear your immediate cutting path of tripping hazards, loose stones, and overhead hanging limbs. For smaller pruning jobs near ground level, property owners often alternate between motorized timber tools and hand saws for cutting branches to maintain clean cuts in tight foliage. However, whenever you pick up a high-velocity powerhead, secure footing on level ground is mandatory. Keeping two stable feet planted firmly on the ground minimizes rotational kickback risks and gives you full control over the tool.
Battery Preparation and Dual 18V LXT Pack Installation
Makita 36V cordless chainsaws, including models like the Makita XCU07PT 18V X2 (36V) and Makita XCU04PT1 36V (18V X2), rely on two 18V LXT lithium-ion batteries wired in series. Both battery packs must be inserted simultaneously to complete the 36V circuit and deliver full motor power. If either battery is missing, improperly latched, or completely drained, the internal electronics will not allow the motor to spin. Always use matching battery capacities, such as dual 5.0Ah packs, to maintain balanced voltage discharge under heavy cutting loads.
Inspect the battery terminals for dust, sap, or moisture before sliding them into the dual powerhead slots. Align the raised ribs on each battery cartridge with the corresponding grooves on the chainsaw housing. Slide each pack firmly into place until you hear an audible click from the red locking tab. Give each battery a gentle tug to verify that both locking mechanisms have engaged securely before picking up the saw.
Check the integrated fuel gauges on each battery pack by pressing the small indicator button on the back of the casing. Both batteries should show an equal state of charge before you begin any firewood bucking or tree limb removal. If one battery has only a single bar of charge while the other is full, the saw will shut down prematurely under load due to low-voltage protection. Keeping a matched pair on a dual-port rapid charger ensures balanced runtimes and preserves overall pack longevity.
The Complete Step-by-Step Makita Chainsaw Starting Sequence
Once your batteries are locked into position, set the chainsaw on a clean, level surface or hold it firmly by the front handle. Verify that the guide bar and saw chain are not touching any logs, limbs, workbenches, or clothing. Locate the main power button on the top rear of the handle housing, which sits adjacent to an integrated LED indicator light. Press and hold the main power button for approximately one second until the green LED illuminates brightly.
With the green power light glowing, inspect the position of the front handguard. Pull the front handguard firmly backward toward the top handle until you feel a positive mechanical click, which disengages the chain brake. The chain brake serves as a mechanical barrier; if the brake remains pushed forward, the internal safety interlock will prevent the drive motor from rotating. Hearing that distinct click confirms the internal brake band has released the clutch drum.
Firmly grasp the rear handle with your dominant hand and wrap your fingers securely around the grip. Use your thumb to depress the lock-off lever situated on top of the rear handle. While holding down this safety lever, gently squeeze the variable speed trigger switch underneath the handle grip. The outer rotor brushless direct-drive motor will immediately engage, spinning the chain smoothly along the guide bar.
Modulate your finger pressure on the variable speed trigger to control the cutting velocity. Makita direct-drive brushless motors can ramp up to high chain speeds of 0 to 3,940 FPM for aggressive wood removal. Releasing the trigger instantly cuts electrical current to the stator, bringing the cutting chain to a rapid stop. Never attempt to lock the trigger open with tape or mechanical clamps, as the variable trigger is your primary operational throttle.
Understanding the Main Power Button and Auto Power-Off Feature
Makita incorporates an intelligent auto power-off function to prevent accidental starts and conserve lithium-ion battery capacity. If you press the main power switch but do not pull the trigger within a brief delay window, the tool automatically turns itself off. The green LED will extinguish, rendering the trigger switch completely inert. This built-in timer protects operators who might set the saw down momentarily to adjust a log or reposition a work piece.
Operators unfamiliar with this safety mechanism often assume their chainsaw has suddenly developed an electrical fault. When the saw powers down after sitting idle on a log, simply press the main power button again to wake up the system. Confirm that the green indicator shines steadily before attempting to pull the lock-off lever and trigger switch. Understanding this automatic sleep feature prevents unnecessary downtime and eliminates confusion on the job site.
Some models also feature an electronic overload alert system integrated into the main power LED. If the chain binds hard in a pinched kerf or the motor draws excessive current, the LED may flash rapidly to signal an electrical shutdown. When this occurs, release the trigger, free the guide bar from the binding cut, and cycle the main power switch off and on. Allowing the internal motor controller to reset clears the safety fault and restores standard throttle response.
Chain Brake Activation and Kickback Prevention Protocols
The front handguard operates a dual-action chain brake designed to halt the chain in a fraction of a second. Pushing the handguard forward toward the bar nose activates the internal brake band, locking the drive sprocket mechanically. You can engage this brake manually with the back of your wrist, or it will engage automatically via inertia during a severe rotational kickback event. Always engage the chain brake whenever you carry the saw between work locations or set it on the ground.
Failing to disengage the chain brake before squeezing the trigger is the single most common reason a Makita chainsaw appears unresponsive. If you pull the trigger with the brake engaged, the electronic controller detects high resistance and cuts power to avoid burning out the brushless motor coils. Always ensure the front guard is pulled back into the run position before pressing the power button. Developing this habit protects both the operator and the internal direct-drive mechanics.
Kickback occurs when the moving chain around the upper quadrant of the guide bar tip makes contact with solid timber or foreign objects. ANSI B175.1 standards govern low-kickback guide bars and chain profiles to reduce these reactive forces during bucking and limbing. Keep both hands locked onto the handles with your left thumb wrapped securely under the front handlebar at all times. Maintaining a balanced stance ensures you can absorb sudden pushback or pull-in forces without losing control of the cutting path.
Checking and Adjusting Chain Tension Before Powering Up
Proper chain tension is essential for smooth starting and safe cutting performance. A chain that is too tight places excessive drag on the brushless motor, drawing excessive current and triggering electronic over-current shutdowns. Conversely, a loose chain can derail from the guide bar groove at high chain speeds, posing serious injury risks to the operator. Before powering on the tool, check that the chain drive links are fully seated inside the bar rails without any noticeable belly sag underneath.
Makita offers two distinct chain tensioning mechanisms across their cordless product lineup. The Makita XCU07PT 18V X2 (36V) utilizes traditional captured bar nuts and a lateral tensioning screw operated with a standard scrench tool. Loosen the dual captured nuts slightly, hold the guide bar nose upward, and turn the lateral screw clockwise until the chain snaps cleanly back against the rail. Tighten the captured nuts firmly while holding the nose elevated to lock the guide bar securely in place.
In contrast, models like the Makita XCU04PT1 36V (18V X2) feature a tool-less chain adjustment system. With tool-less setups, you lift and rotate a folding lever to loosen the side cover, then turn an external thumbwheel dial to adjust chain tension. This mechanism eliminates the need to carry a scrench into the woods for quick midday tensioning adjustments. While convenient for light yard work, tool-less dials require regular cleaning to remove packed sawdust from the internal adjustment gears.
Perform a quick snap test with gloved hands to verify correct tension before turning on the powerhead. Pull the chain downward from the center of the guide bar rail; the drive links should remain partially engaged in the bar groove and snap crisply back into place when released. With the chain brake disengaged and the batteries removed, pull the chain along the top rail by hand to ensure it glides freely without binding. Never adjust or touch the cutting chain while the batteries are installed in the tool.
Verifying Bar Oil Flow and Automatic Lubrication
A chainsaw should never be operated dry, as friction between the chain drive links and guide bar rails will cause severe heat buildup and scorched metal. Makita chainsaws feature automatic bar lubrication systems that deliver oil whenever the drive motor rotates. Before starting the motor, inspect the translucent oil reservoir window to confirm you have adequate bar and chain lubricant. Fill the reservoir with high-tack bar oil specifically formulated to resist flinging off at chain speeds up to 3,940 FPM.
Confirm that the automatic oiler is functioning properly immediately after powering on the saw. Hold the running guide bar approximately six inches above a clean surface, such as a piece of light-colored cardboard or a freshly cut stump. Squeeze the variable speed trigger to run the motor at moderate speed for five to ten seconds. You should observe a faint spray or fine line of oil droplets slinging onto the surface, confirming that the pump and bar oil passages are clear.
If no oil appears on the test surface, release the trigger and power down the saw immediately. Remove the guide bar side cover and inspect the small oil discharge port on the powerhead chassis and the matching inlet hole on the guide bar. Compacted sawdust and dried tree sap frequently clog these narrow passages, starving the cutting teeth of lubrication. Clearing these ports with a small wire or scraper restores oil delivery and prevents costly damage to the bar rails.
Troubleshooting a Makita Chainsaw That Fails to Spin
When your Makita cordless chainsaw fails to start after pressing the power button, follow a logical process of elimination to locate the fault. First, check the main power LED indicator on the handle; if the light remains dark, the auto power-off function may have engaged, or the battery packs may be dead. Verify that both 18V batteries are fully seated, locked into their slots, and sufficiently charged. A single depleted battery pack in the series connection will prevent the entire 36V system from activating.
If the green LED is illuminated but the motor does not turn when you squeeze the trigger, inspect the front handguard immediately. The chain brake may be locked in the forward safety position, which electronically disconnects throttle input. Pull the handguard backward toward the rear handle until you feel the mechanical release click. Additionally, confirm that you are depressing the top lock-off lever completely before pulling upward on the variable speed trigger switch.
Thermal protection is another common cause of sudden no-start conditions, especially during demanding bucking cuts in seasoned hardwood. If the brushless motor controller or lithium-ion cells exceed safe operating temperatures, the onboard Star Protection computer controls shut down the circuit. When this happens, allow the tool and battery packs to cool in the shade for ten to fifteen minutes before attempting a restart. Operating within reasonable duty cycles prevents overheating and extends the service life of both the motor and battery cells.
Finally, check for mechanical obstruction around the drive sprocket and guide bar nose. Wood chips, stringy bark, or frozen debris can jam behind the side cover, preventing the chain from rotating freely. Remove the battery packs, loosen the bar nuts or tool-less dial, take off the sprocket cover, and clean out any packed debris. Similar to inspecting electric cutting tools for structural posts, ensuring a clean drive mechanism allows electric motors to spin up instantly without tripping over-current protection circuits.
Starting and operating a Makita cordless chainsaw becomes second nature once you understand the electronic interlocks and safety steps. Keeping dual 18V batteries evenly charged, clearing the chain brake, and observing the green LED auto power-off light ensures reliable operation on every cut. By pairing proper pre-start inspections with routine chain tensioning and bar oil checks, you will keep your brushless chainsaw running smoothly through storm cleanup, firewood bucking, and backyard maintenance for years to come.
About the author
Tony Flanders is an experienced astronomy writer and observer with a background in mathematics, technical research, and science communication. His extensive observing experience includes exploring deep-sky objects through different telescope configurations. He specializes in making complex astronomical concepts accessible to beginners and experienced observers alike.