
How to Use an Electric Snow Shovel: A Practical Guide for 2026
Learn how to use an electric snow shovel safely and effectively in October 2026 to clear steps, decks, and walkways without straining your back.
 By John Snow
Updated October 2, 2026
By John Snow
Updated October 2, 2026

Fresh winter storms often leave driveways, steps, and wooden decks buried under a layer of dense, cold powder that demands fast removal before foot traffic packs it into hazardous ice. Lifting repeated scoops of wet accumulation with traditional hand tools rapidly strains the lumbar spine and shoulders, which is why many homeowners seek mechanical alternatives. Learning how to use an electric snow shovel bridges the gap between backbreaking manual labor and operating an oversized, gas-guzzling two-stage snow blower. While standard manual tools excel at specific tasks like those covered in our heavy-duty manual shovel guide, a powered snow thrower utilizes a high-velocity rotating auger to cast powder away with minimal physical effort.
Operating these motorized tools efficiently requires understanding their specific mechanical limitations, optimal feed rates, and directional controls. Whether dealing with compact residential walkways or sprawling patio surfaces, matching your forward pacing to the depth of the drift prevents motor stalls and battery overheating. Proper ergonomic setup, thoughtful path planning, and careful ground clearance checks will ensure clean pavement without throwing dangerous debris or scratching delicate decking surfaces. By following safe operating procedures and battery management protocols, you can maximize clearing speed while protecting your joints throughout the freezing winter months.
| Award | Product | TGH Score About TGH ScoreThe TGH Score is our own rating from 0 to 10, based on performance, design and build, ease of use, and value. It reflects independent research and is never influenced by manufacturers, retailers, or affiliate commissions. Learn more › | |
|---|---|---|---|
| Best Overall |
14" Cordless Snow Shovel w/ 2 Batteries
|
9.1/10 | Buy |
| Best Budget |
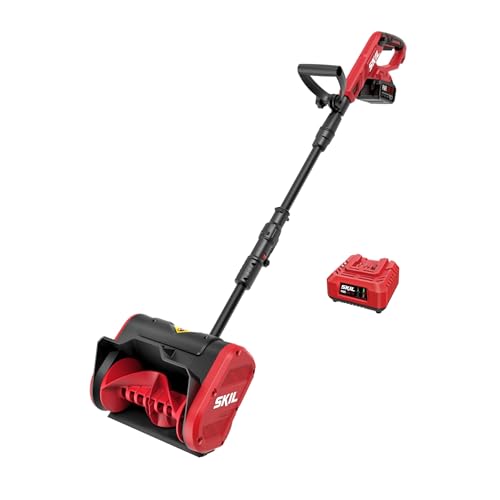 SKIL PWR CORE 20 10" Snow Shovel Kit
|
8.9/10 | Buy |
 Snow Joe Cordless Electric Snow Shovel
|
8.9/10 | Buy |
Mastering Electric Snow Shovel Operation: Technique, Safety, and Winter Maintenance
Operating a powered snow shovel involves balancing forward travel speed with the rotational momentum of a high-speed paddle auger. Unlike conventional push shovels that rely purely on upper-body exertion, motorized units propel snow forward or off to the side using high-torque electric motors. Mastering this equipment requires understanding proper stance, trajectory management, and cold-weather battery characteristics so you can work efficiently without damaging surfaces or overtaxing the machine.
Pre-Operation Setup and Cold Battery Conditioning
Before powering on any motorized snow shovel, inspecting the clearing zone is essential for personal safety and equipment longevity. Hidden obstacles such as extension cords, doormats, decorative stones, and fallen branches can instantly bind a rotating paddle auger. Striking hard debris can shatter high-speed plastic blades, bend drive shafts, or launch dangerous projectiles across your yard. Take a few minutes prior to snowfall, or use a flashlight in dim conditions, to ensure your clearing path remains entirely free of stray objects.
Lithium-ion batteries require specific thermal care to deliver their full rated runtimes in freezing conditions. Storing your power packs inside a temperature-controlled living space until the moment you begin clearing prevents voltage drop caused by frozen electrolytes. Inserting a cold battery directly from an unheated garage can cut operating duration in half and reduce peak power output. When snapping a warm battery pack into the tool socket, verify that the latches engage firmly to prevent snow intrusion into the electrical contacts.
Ergonomic Grip Adjustment and Body Mechanics
Achieving a balanced stance significantly reduces the physical fatigue associated with pushing a powered snow shovel through dense drifts. Adjust the secondary assist handle along the shaft so your dominant forward arm remains slightly bent at the elbow when the shovel base rests flat on the ground. When using models featuring telescoping shafts, extend the pole until you can grip both handles without rounding your lower back. Maintaining an upright spinal posture allows your larger leg and hip muscles to generate the forward pushing force.
Lifting biomechanics when handling wet snow share fundamental principles with heavy landscape excavation. As highlighted in our heavy clay soil digging guide, bending at the knees and engaging your core stabilizes the spine when maneuvering dense, resistant loads. Even though a cordless snow shovel eliminates the dead-weight lifting of ordinary scoops, navigating uneven terrain still places rotational stress on your torso. Keep your elbows tucked near your ribs and step forward smoothly rather than lunging or twisting your torso while the auger runs.
Motor Startup and Trigger Management
Properly initiating the motor prevents sudden current spikes and protects the mechanical drive belt from premature wear. Most cordless snow shovels feature a two-step safety switch consisting of a lock-off button and a primary trigger throttle. Depress the lock-off button fully with your thumb before squeezing the main switch lever to activate the motor. Always bring the paddle auger up to full rotational speed in open air before plunging the intake housing into a snowbank.
Starting the machine while the paddles are already buried in deep snow creates massive resistance against the electric motor. This abrupt mechanical load can trip internal overload circuits, blow fuses, or burn electrical coils inside brushed powerheads. If the motor bogs down or cuts out during operation, release the trigger instantly and pull the tool backward a few inches. Allow the auger cavity to clear completely, re-engage the throttle at full speed, and then ease back into the drift with a steady, controlled feed rate.
Path Strategy and Discharge Trajectory Control
Strategic path planning prevents you from throwing snow over areas you have already cleared, saving substantial time and battery life. Begin by observing the prevailing wind direction before making your very first pass across the driveway or patio. Operating directly against a headwind causes high-speed discharge to blow straight back into your face and coat the machine in freezing slush. Always orient your travel passes so the thrown snow travels downwind or parallel to the natural breeze.
Directional discharge deflectors provide vital control over where the expelled snow stream lands. When clearing a wide driveway, start down the center and cast snow toward the outer perimeters with the deflector angled outward. Working outward from the center prevents accumulating massive perimeter berms that exceed the clearing height of a compact powered shovel. Careful boundary awareness is also crucial near parked vehicles and basement windows, as high-velocity discharge can propel ice pellets that chip paint or crack glass.
Surface Protection for Wooden Decks and Pavers
Pavement and decking materials react differently to mechanical scraper bars, requiring distinct operational precautions. Traditional metal-bladed snow pushers often scratch stained cedar boards, gouge composite decking, or catch on paver joints. In contrast, electric snow shovels typically utilize cold-resistant polymer or ABS augers along with composite scraper bars designed to slide safely over finished surfaces. Trapped dirt or small stones under the scraper can still cause abrasions, so inspect your clearing edge before starting.
Navigating textured cobblestones, flagstone walkways, or cracked concrete slabs requires raising the front edge slightly. Pushing an electric shovel firmly into an uneven sidewalk expansion joint will cause the tool to stop abruptly, jarring your wrists and potentially damaging the lower housing. By applying mild downward pressure on the handle, you can elevate the front scraper bar a quarter of an inch above irregular seams. This slight tilt allows the rotating paddles to clear the majority of the drift without hanging up on sharp pavement edges.
Loose gravel paths require extreme caution and should generally be avoided with electric paddle shovels. Rotating paddles contact the ground closely, readily scooping loose stones and blasting them through the discharge chute like shrapnel. For heavy loose aggregate projects in other seasons, consulting our bulk material scoop guide provides valuable insight into manual scooping dynamics that avoid mechanical damage. When forced to clear snow over gravel, keep the shovel elevated several inches above the ground to skim off surface powder only.
Stepped Layering Technique for Deep Drifts
Compact electric snow shovels are engineered primarily for clearing modest accumulations ranging between three and eight inches deep. When blizzard conditions dump snowfall that exceeds the intake height of your machine, attempting to plow through the full depth at ground level will stall the motor. Aggressively forcing the tool into deep snow causes the auger to choke, packing dense powder against the housing walls. Instead of a single full-depth sweep, deep accumulations require a methodical multi-stage skimming approach.
Execute top-down layering by lifting the shovel head slightly and pushing forward into the upper half of the snowbank. Allow the high-speed paddles to plane away the top three or four inches of snow on the initial forward push. After casting the upper layer into the yard, step back and make a second pass along the pavement surface to clear the remaining base accumulation. This step-cutting method prevents motor strain while keeping the front intake open to process snow efficiently.
Handling Wet Slush Without Motor Strain
Wet, saturated snow presents the toughest mechanical challenge for any residential snow removal tool. High moisture content increases the density of the accumulation dramatically, turning light powder into a sticky sludge that adheres to auger surfaces. This heavy slush creates substantial drag on the motor and can clog internal discharge chutes within minutes. To prevent excessive heat buildup in the motor windings, narrow the width of each forward pass to half the clearing deck capacity.
Taking partial-width cuts reduces the total volume of slush entering the auger paddles at any single instant. If your machine features a ten-inch or fourteen-inch clearing width, overlap your cleared tracks by four to five inches on subsequent sweeps. Applying food-grade silicone spray or specialized snowblower non-stick wax onto clean, dry auger components before heading into a storm also creates a slick hydrophobic barrier. This treatment helps slush slide smoothly through the discharge channel instead of bonding to cold plastic walls.
Safe Clearing Protocol for Auger Blockages
Foreign objects or dense ice chunks can occasionally wedge between the rotating paddle and the outer plastic cowl, stopping the motor dead. Under no circumstances should you ever reach into the auger housing with your hands while a power source remains connected. Even when the trigger is released, residual mechanical tension in the drive belt or motor armature can cause the paddles to snap forward abruptly when an obstruction is freed. That sudden snap can cause severe crush injuries or lacerations to unprotected fingers.
Always follow a strict isolation sequence before addressing any mechanical jam or blockage. Release the trigger throttle, step back from the unit, and immediately disconnect the lithium-ion battery pack from the handle socket. Once the battery is removed and set safely aside, place the shovel flat on a stable surface. Use a wooden clearing stick or a stiff plastic scraper tool to dislodge packed ice, rocks, or tangled cords from the paddle blades before testing the motor.
Post-Use Drying, Battery Storage, and Care
Proper post-clearing routines prevent corrosion, electrical faults, and premature mechanical wear throughout the winter months. After releasing the trigger on your final pass, hold the shovel off the ground and tap the housing gently to dislodge loose powder. Use a soft nylon brush to wipe away clinging snow from the motor vents, battery compartment, and handle adjustment joints. Allowing melting snow to seep into unsealed electrical housings or battery terminals can cause short circuits and terminal oxidation.
Never plug a freezing lithium-ion battery into its charging dock immediately after coming inside from the cold. Lithium cells cannot safely accept high charging currents when their internal core temperatures are near or below freezing, which can cause permanent cell degradation or trigger charger safety faults. Allow the battery pack to rest at indoor room temperature for at least forty-five minutes before placing it on the charger. Once recharged, store the batteries in a dry, temperate environment rather than leaving them in a cold vehicle or outdoor shed.
Capacity and Design Factors Across Electric Models
Selecting the proper operational approach depends heavily on the specific engineering parameters of your chosen electric snow shovel. The 14″ Cordless Snow Shovel w/ 2 Batteries from Generic features an 830W high-performance copper motor spinning up to 16,000 RPM, paired with a wide fourteen-inch clearing deck and a three-way directional deflector. With a stated ability to throw powder up to thirty-three feet and clear depths up to eight inches, this platform suits broader residential sidewalks and multi-car parking slabs. Its dual battery setup provides extended runtime, while the double-folding back saver handle allows convenient upright storage.
Homeowners prioritizing nimble handling for tight steps and elevated wooden balconies often prefer more compact designs. The Snow Joe Cordless Electric Snow Shovel weighs only 8.4 pounds, incorporating a brushless 20V motor driving a two-blade paddle auger at speeds up to 21,200 RPM. Cleared paths measure ten inches wide by five inches deep with an eighteen-foot throw range, making it exceptionally maneuverable on narrow porch stairs. Its telescoping shaft extends from forty-seven to fifty-two inches, allowing operators to maintain an upright ergonomic stance without back strain.
For modest residential walkways and single-car driveways, balanced kits like the SKIL PWR CORE 20 10″ Snow Shovel Kit provide reliable, straightforward utility. Equipped with a 20V 4.0Ah battery, this ten-inch clearing tool moves snow up to twenty feet and clears up to three inches of accumulation across typical driveway spaces on a single charge. Its split-shaft configuration breaks down quickly for compact storage in crowded utility closets. Matching your clearing expectations to your tool’s clearing width and battery capacity ensures seamless winter maintenance without unexpected downtime.
Operating an electric snow shovel with steady pacing, proper stance, and methodical layering transforms a grueling winter chore into a swift, manageable task. By inspecting your pavement for hidden hazards, angling directional discharge strategically, and protecting your battery packs from freezing cold, you maximize both machine lifespan and personal safety. Respecting the operational limits of your tool will keep your walkways and decks pristine all winter long without unnecessary fatigue.
About the author
John Snow is an established outdoor journalist and equipment editor with decades of experience covering technical innovations, product evaluations, and outdoor equipment. His background in investigative reporting and technical journalism provides a strong foundation for explaining complex product specifications and helping consumers understand equipment performance.